General Use of Transformations
General Use of TransformationsWe will demonstrate the use of transformations by a simple translation. The generation of a transformation consists of two steps:
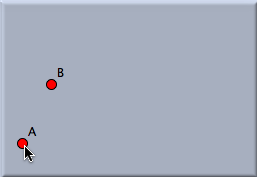
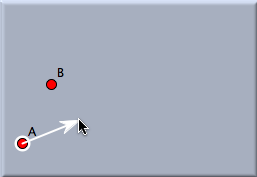
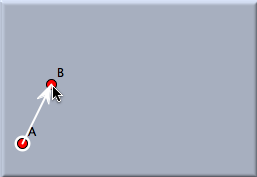
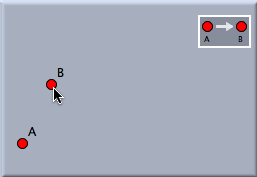
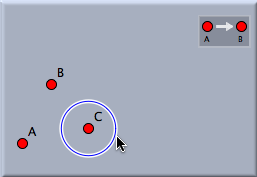
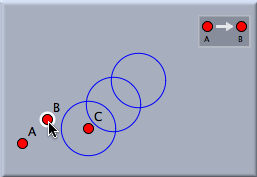
During a move in move mode, the parameters of a transformation become updated automatically such that the images of the transformed objects move accordingly. Defining a TransformationAs with the usual geometry modes, how to define a transformation depends on the exact type of transformation you want to define. A translation is defined by clicking two points A and B. This translation corresponds to the geometric shift that moves A to the position of B. Consider the following example: Assume that points A and B are already present in the drawing. To define a translation you have to choose the mode Translation from the Mode -> Transformation menu. After point A is clicked, an arrow appears as an optical hint for the construction of the translation. Then you click point B. After this, a little rectangle, a so View Button, appears that serves as a link to the translation further on.
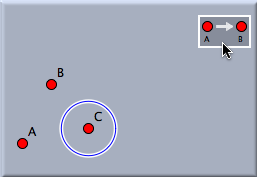
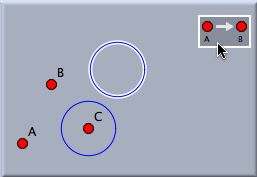
The view button serves a kind of representative for the transformation and acts almost like an ordinary geometric mode. By pressing it you apply the transformation to the currently selected elements. Applying a TransformationAfter you have defined the transformation, you can use it. For this you have to go to Move Mode, which at the same time serves as the selection mode. Now you select one or several elements by clicking them. If you want to have a multiple selection, you must hold down the shift key. After you have selected the elements you want to map via your translation, you simply press the view button of your transformation. In this way the mapped elements are created. They will automatically have the same appearance settings as their preimages. Furthermore, they will automatically become the active selection, so that you can easily apply a transformation to them again.
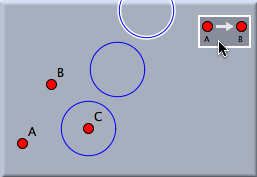
Changing the Parameters of a TransformationA transformation is a dynamic object. If the position of the preimages changes, then the mapped elements become updated accordingly. If in our example A or B is moved, then the mapped circles will move as well.
Selecting a TransformationSometimes, it may be necessary to select a transformation. This can also be done in Move Mode. However, for selecting the transformation you have to press the shift key while you click it. Selected transformations may be used as input parameters for transformation groups or iterated function systems.
Contributors to this page: Richter
,
Kohler
,
Kortenkamp
and
Kramer
. The content on this page is licensed under the terms of the License. |
Login |